Friday, April 10, 2015

The Love Project--horizontal seams

Wednesday we spent the day driving to NC. 
I unpacked my sewing machine Thursday and managed to sew the top section.


I always begin with the seams pointing up.
Every other row is pointed UP.
I sew all of those then trim.


See how it looks like mountains before ironing?

This is the top section with half the seams sewn.

This is done. 
The 1" squares are now 1/2" with the seam allowance trimmed or hidden on the back of the quilt top.


This cute little trio resides here in NC. 
Each panel is 5 1/2" x 11 1/2".

This is morning, noon, and evening at the beach.
I used the exact same shape to make the trees, sun and girl's hair.
Those shapes were appliquéd on after piecing.

Find 5 SMILES.

Find 5 FACES.

Find 5 BUTTERFLIES.
Enjoy!


Wednesday, April 8, 2015

The Love Project--Last row

These are special things that are going into the last row somewhere.
These are not ALL that will go in because I change things right at the sewing faze.

This is the lower corner. The border pieces are cut 1" x 1 1/2" and the corner square is 1 1/2".

Rolling along, here is the middle part.

Yay! Last part is ready to be sewn.
See those squares that have a red border around them? The red part is in the seam allowance and will not be visible when all the seams are done.

See how those red rimmed squares now only have the top and bottom red showing?
Once the horizontal seams are sewn they will disappear and you'll have to look closely to find those special squares. Hidden!

Recap: Cross stitch pattern by Tiny Modernist. It is a free pattern (for Valentines Day) from her Facebook page.
Blown up and pieced in 4 sections using 1" squares of fabric.
All the vertical seams are done and the rows of squares are being held together by chain piecing.
Next I will sew all the horizontal rows.
EVERY vertical seam was trimmed to 1/8"!

Here is my pile of trimmings!

And here is another fun quilt made of 1/2" squares.
My quilt is called "Barton Beach" because it is an interpretation of a Steve Barton painting that hangs over our couch. This painting is called "Living In Paradise". We own the original but he still sells prints of it. I love the little pink house on the island. Doesn't it look like you could swim out there?

My quilt has the words BARTON BEACH in letters on the island beach.
It has fish in the water, starfish too.
Raggedy Ann & Andy are looking out of the windows of the house.
There is a pirate, a compass, an X marking the buried treasure.
Sun is shining down lighting up the scene with some metallic fabrics.
There are some dogs, bugs and more fun things.
I sent this to Steve as a thank you for hosting us at dinner in his house in California.
It was fascinating seeing his studio and he even painted for us--he is a leftie!


Sunday, April 5, 2015

The Love Project--Row 3 done

This weekend was a good sewing weekend. I arranged and sewed all 3 sections of ROW 3.

This is the first section of ROW 3 ready to be sewn.

My messy worktable holds all the little "paint" squares of fabric.


Section 2 of ROW 3 ready to sew.

Section 3 of ROW 3 ready to sew.

The horizontal seams have NOT been sewn on this section yet.
This quilt is for Earl and Katie.

They will be getting married 7-25-2015.

ROW 3 is done!

This is the 3 rows laid out together so far.
It will be HALF this tall because of the horizontal seam allowances.
One last row to do.


Here is another example of a quilt using 1/2" squares of fabric.
This quilt is all fussy cut except the background. 
It was made for the silent auction at my quilt guild's quilt show.
I don't know who owns it now but I hope it has a happy home.


Saturday, April 4, 2015

The Love Project--Row 2 done

When I started this project I divided the cross stitch pattern (by Tiny Modernist) into sections to make it easier to assemble.
The top part is what I'm calling ROW 1.
Today I finished ROW 2.
I am not going to sew the 2 sections together yet because it will be easier to sew the horizontal rows if I have smaller sections to work with.

I cut some more interesting squares for the quilt.
2 spider faces, a clown and a rooster.

Here is the clown hiding.

Another person here and I LOVE YOU add interest.

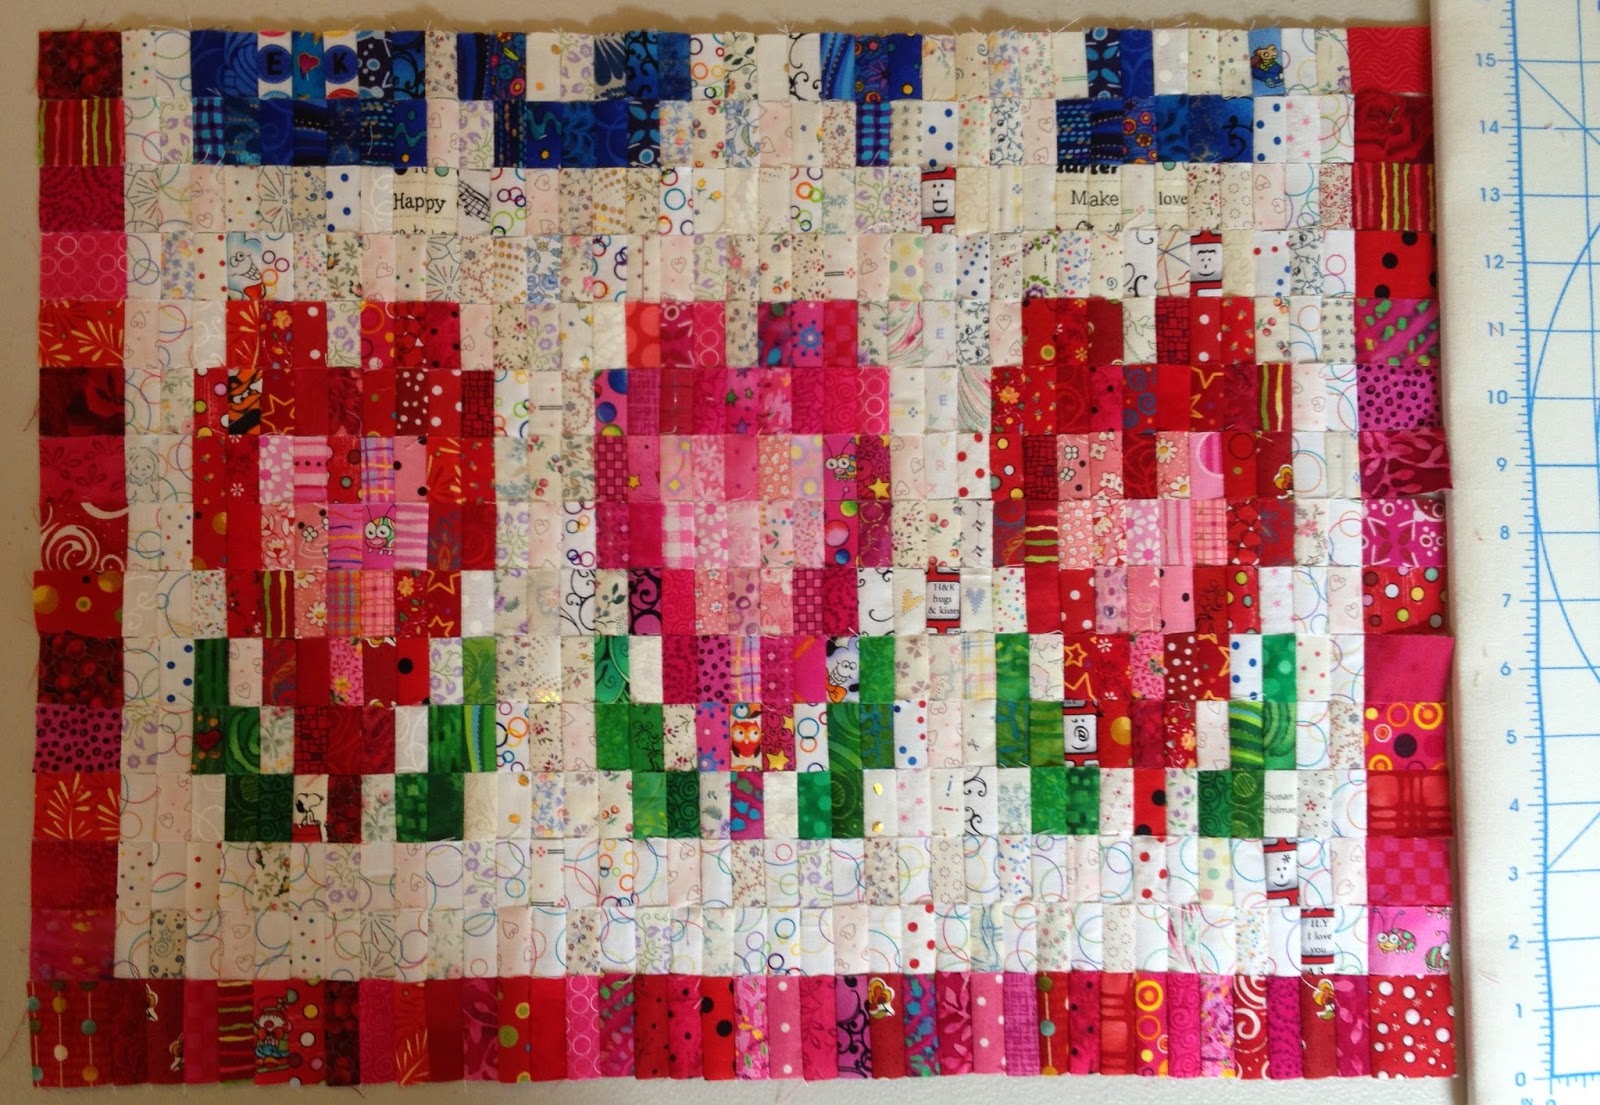
These are Rows 1 & 2. This is about half of the pattern.

These are the remaining sections for ROWS 3 & 4.

This is a good example of a 1/2" square project:
This is what the little quilt looks like when it is laid out in 1" squares.
You are seeing all the seam allowances here along with the interesting centers.

This is what it looks like with all the vertical seams sewn.
See how it "shrunk" in width? This is the stage my Love Project is in now.

This little quilt is now the front of a clipboard!
See how tidy the green trees are now? 
And the yellow sun is all yellow now that the seam allowances are hidden.
This isn't a clear picture of the final quilt (and I can't find it to take another one!) but hidden in this quilt are 5 of EACH: frogs, people, birds, cats, fish and dragonflies.

This is the back of the clipboard quilt before sewing it.

This has the vertical seams sewn.

In the final quilt FIND 5 of each: lady bugs, bees, smiling faces, butterflies, snails, snowmen and the word JOY.
Boy, I wish I could find this clipboard to get a clearer photo. I'm sure it will turn up someday.


Friday, April 3, 2015

The Love Project--progress report

To recap: I'm making a quilt out of 1/2" squares of fabric using a Counted Cross Stitch pattern by Tiny Modernist. The pattern was a free Valentines Day pattern on the Tiny Modernist's Facebook page. I sent Cheryl McKinnon an email letting her know I'm making her pattern into a quilt. It is always important to give credit for creative work to the original source.
This is what it would look like if it was done in cross stitch.
My bits and pieces look distorted because I haven't sewn ANY horizontal seams yet.
This is the 2nd row in progress. 
First section is sewn and second section laid out in squares.

This photo shows 2 sections sewn and the last section of the 2nd row started.
This process is intense work and life is busy so progress is slow.

I will leave you with another project that used 1/2" squares of fabric to make the quilts for the cover and back of a children's book I wrote.
This book was inspired by my friend Sandy's kindergarten class.


See all the fussy cut squares of faces and eyes?

See all the children? Find the tiny frog looking at a dragonfly....
The book is all photographs of a bunch of little quilts with the words overlaid like above.


This is the set of quilts I used for the book.


You can read the whole book on my Facebook page Susan's Quilt Creations.
Or you can purchase a copy in my Etsy store HERE.

I've got a busy day ahead of me that doesn't include quilting. 
Maybe I can make up lost time this weekend. Until then happy sewing.


Thursday, April 2, 2015

The Love Project--working on row 2

The top row of the pattern is done and sitting above my work area, so I can reference it for continuity.
I numbered the first section of row 2 with numbers across and down (like battleship).
It's easiest to begin with the border and white alternating, then light pink and red.

Once the red is done then I fill in with the dark pink.
This Cross Stitch pattern by Tiny Modernist shows some white squares in the big heart. I've chosen to use a white fabric with either blue or yellow hearts for those spots.

This section is now ready to be sewn.

This is the 2nd section of row 2.

Ready to sew.


I can't figure out how to add a video clip to my blog but if I could I'd add a 5 second video of a HUGE pine tree being cut down in our backyard. The THUD when it hit the ground shook the house and you can hear it rattle the door. (No joke.)

And another little quilt for you...
I didn't make this for any specific purpose, just fun. But I did learn a few things here.
The black/yellow diagonals are PIECED. But the black/red diagonals and the blue/red were fussy cut from one fabric.

Dragons anyone? I like to play with fussy cutting.

See the "To my Valentine" square?

Enjoy.